is just as important as taking the right dose. Poor injection technique can lead to pain, bruising, variable blood
sugar control, and skin problems such as lumps under the skin.
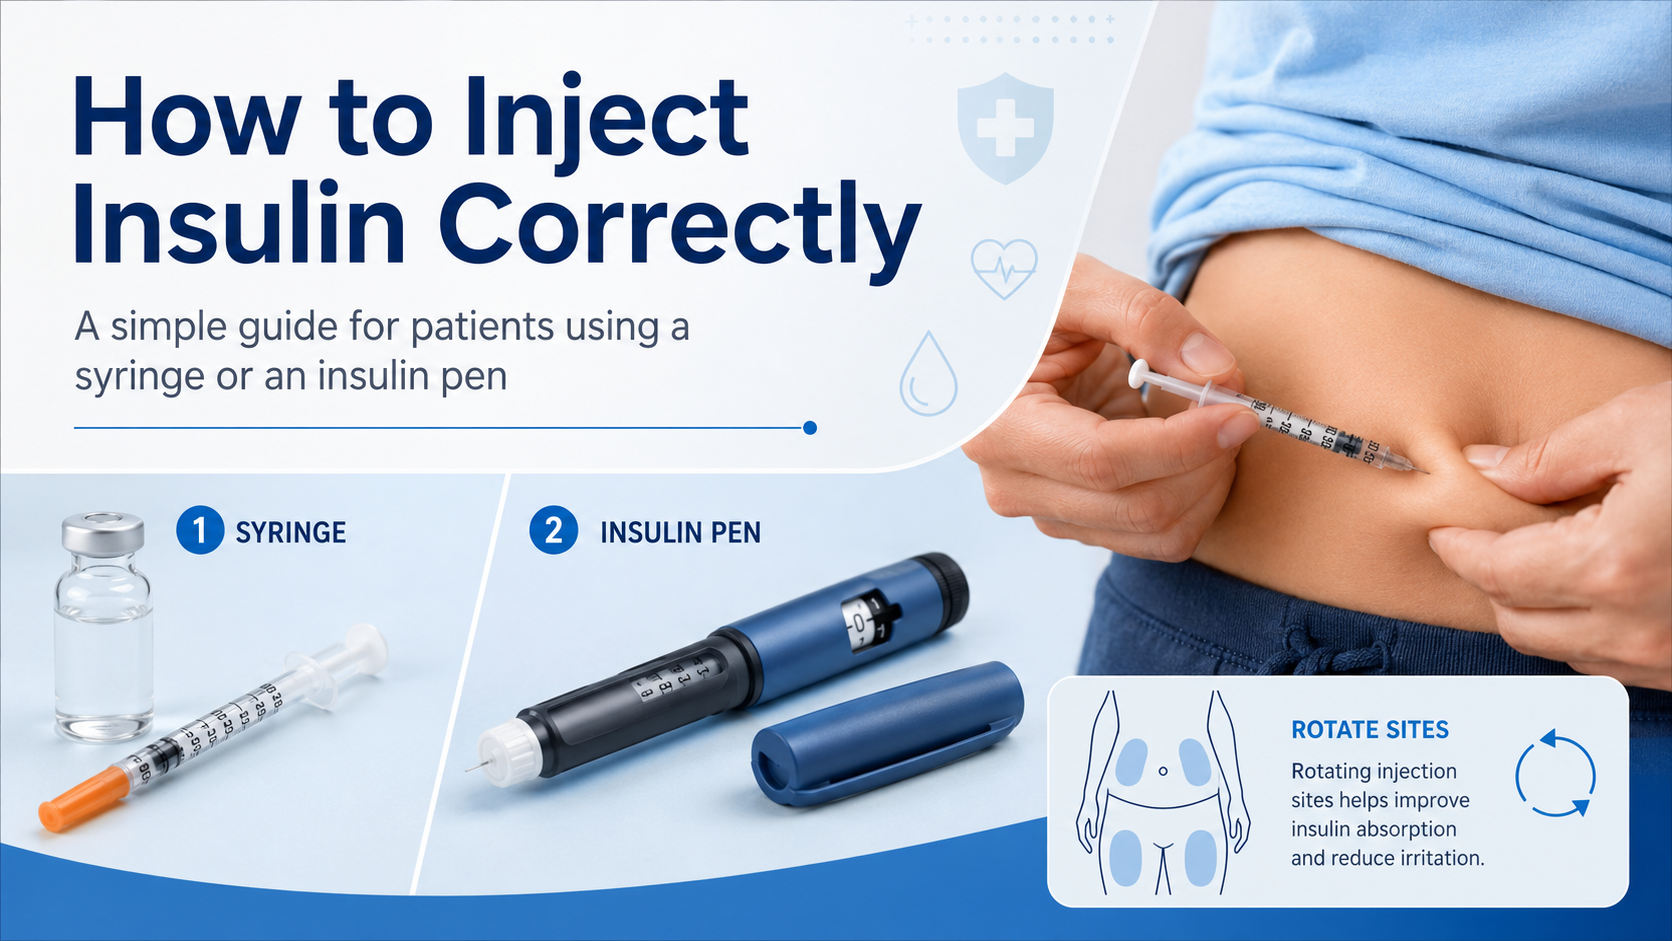
This guide explains, in simple language, how to inject insulin properly using either a
syringe and vial or an insulin pen.
Why correct insulin injection technique matters
Correct injection technique helps to:
- Deliver the right dose of insulin
- Reduce pain during injection
- Improve blood sugar control
- Prevent insulin leakage
- Avoid skin thickening and fatty lumps at injection sites
- Reduce the risk of low or high blood sugar due to poor absorption
Even when the correct dose is prescribed, poor technique can make insulin work unpredictably.
Where should insulin be injected?
Insulin is usually injected into the subcutaneous tissue, which is the layer of fat just under the skin.
Common injection sites are:
- Abdomen except for a circle about 2 finger breadths around the navel
- Front and outer part of the thighs
- Outer upper arms
- Buttocks
Best site for fastest absorption
The abdomen is usually the best site for consistent absorption, especially for mealtime insulin.
Important point
Do not inject into:
- Scars
- Bruised areas
- Inflamed skin
- Areas with lumps or thickened skin
- Sites that are painful or infected
Why site rotation is important
If you keep injecting into the same spot, you may develop lipohypertrophy, which means fatty lumps
or thickened skin. Insulin injected into these areas may not absorb properly.
A good habit is to:
- Use the same general area for consistency
- Move each injection at least 1–2 cm away from the previous one
- Rotate systematically within that area
For example, if you use the abdomen, move around different points of the abdomen rather than using exactly the same site every time.
Part 1: How to use insulin from a vial with a syringe
What you need
- Insulin vial
- Insulin syringe
- Alcohol swab or clean tissue if needed
- Sharps disposal container
Step 1: Wash your hands
Wash your hands thoroughly with soap and water and dry them well.
Step 2: Check the insulin
Before drawing up insulin:
- Check the label carefully
- Make sure you are using the correct insulin
- Check the expiry date
- Inspect the insulin
Look at the insulin appearance
- Clear insulin should look clear and colorless
- Cloudy insulin should look evenly milky after gentle mixing
Do not use insulin if:
- It is expired
- It has changed color
- There are particles floating in clear insulin
- Cloudy insulin remains clumped after mixing
- The vial looks damaged
Step 3: Mix cloudy insulin if needed
If you are using cloudy insulin such as NPH, gently roll the vial between your palms about 10 times and tip it up
and down several times until it looks evenly mixed.
Do not shake it vigorously.
Clear insulin does not need mixing.
Step 4: Clean the top of the vial
Wipe the rubber stopper of the vial if needed and let it dry.
Step 5: Draw air into the syringe
Pull back the plunger to draw air into the syringe equal to the number of insulin units you need to inject.
For example, if your dose is 12 units, pull in 12 units of air.
Step 6: Inject air into the vial
Insert the needle into the vial and push the air into the vial. This makes it easier to draw out insulin.
Step 7: Draw up the insulin
Turn the vial and syringe upside down while keeping the needle tip in the insulin.
Pull back the plunger slowly until you draw slightly more than the required dose.
Step 8: Remove air bubbles
Tap the syringe gently so bubbles rise to the top. Push the plunger slightly to remove the bubbles, then draw again
if needed until the correct dose is reached.
Check carefully that the final dose is correct.
Step 9: Choose the injection site
Pick a clean injection site and avoid lumps, bruises, and scars.
Step 10: Insert the needle
With modern short needles, many adults can inject at a 90-degree angle. If the person is thin or has little
subcutaneous fat, gently lift a skin fold and inject at 90 degrees, or sometimes at 45 degrees if advised.
Step 11: Inject the insulin
Push the plunger down steadily until all the insulin is injected.
Step 12: Wait briefly before removing the needle
Wait about 5–10 seconds before removing the needle to reduce leakage.
Step 13: Remove and dispose safely
Remove the needle and syringe safely and place them in a sharps container. Do not reuse disposable needles unless
specifically advised in a low-resource setting, and even then reuse should be minimized because it increases pain,
infection risk, and needle damage.
Part 2: How to use an insulin pen
Insulin pens are convenient and easier for many patients. They improve dose accuracy and are often less intimidating than syringes.
What you need
- Insulin pen
- New pen needle
- Sharps disposal container
Step 1: Wash your hands
Wash and dry your hands.
Step 2: Check the pen
Before injecting:
- Confirm the correct insulin
- Check the expiry date
- Inspect the insulin
- Make sure the pen is not damaged
If it is a cloudy insulin pen, gently roll and tip it until the insulin is evenly mixed. Do not shake vigorously.
Step 3: Attach a new needle
Remove the pen cap and attach a new pen needle securely.
Always use a new needle each time if possible.
Step 4: Prime the pen
Priming removes air and ensures the pen is working properly.
To prime:
- Dial 2 units
- Hold the pen with the needle pointing upward
- Tap the cartridge gently
- Press the injection button until a drop of insulin appears at the needle tip
If no drop appears, repeat until it does.
Step 5: Dial the correct dose
Turn the dose selector to the prescribed number of units.
Step 6: Choose the injection site
Select a proper site and avoid damaged or lumpy skin.
Step 7: Insert the needle
Insert the needle into the skin at 90 degrees. In very thin individuals, a lifted skin fold may help.
Step 8: Inject the insulin
Press the injection button fully until the dose window returns to zero.
Step 9: Keep the needle in place briefly
Keep the needle under the skin for about 10 seconds after pressing the button. This helps ensure the full dose is
delivered and prevents insulin from leaking out.
Step 10: Remove the needle
Take the needle out gently.
Step 11: Remove and discard the needle
Carefully remove the pen needle and discard it into a sharps container. Then replace the pen cap.
Do not store the pen with the needle attached, as this can allow air to enter and insulin to leak.
Important tips for both syringe and pen users
1. Use the correct insulin
Always double-check the label before each injection. Many insulin names and packaging styles look similar.
2. Store insulin properly
General advice:
- Unopened insulin is usually kept in a refrigerator
- Do not freeze insulin
- The insulin currently in use is often kept at room temperature, depending on the product instructions
- Keep insulin away from direct sunlight and excessive heat
Always follow the storage instructions for your specific insulin brand.
3. Inject at the right time
Some insulins are taken before meals, some with meals, and some at bedtime. Follow the timing advised by your doctor or diabetes educator.
4. Do not share pens or needles
Even if the needle is changed, insulin pens should not be shared between people because of infection risk.
5. Check your skin regularly
Look for:
- Lumps
- Thickened areas
- Bruising
- Pain
- Redness
If these occur, discuss them with your doctor and avoid injecting into affected sites.
6. Rotate injection sites
Poor rotation is a major reason for erratic insulin absorption.
7. Do not inject through clothing
It is safer to inject into visible clean skin.
Common mistakes patients should avoid
Some common errors include:
- Injecting into the same spot repeatedly
- Failing to check the insulin label
- Using expired insulin
- Not mixing cloudy insulin properly
- Not priming the pen
- Removing the needle too quickly
- Reusing blunt needles many times
- Storing insulin improperly
- Injecting into muscle instead of subcutaneous tissue
- Using damaged or lumpy skin
When should you seek medical advice?
You should speak to your doctor or diabetes clinic if:
- Injections are very painful
- You notice repeated bruising or insulin leakage
- You have lumps or thickened skin
- Your blood sugar remains uncontrolled despite taking insulin regularly
- You are unsure about your dose
- You are having repeated low blood sugar episodes
- You are confused about the type or timing of your insulin
Final message
Insulin works best when it is injected correctly. Whether you use a syringe and vial or an
insulin pen, good technique can make a big difference to your blood sugar control and your confidence in managing diabetes.
If you are starting insulin for the first time, ask your doctor, nurse, or diabetes educator to watch your technique
and correct any mistakes. A few small adjustments can make insulin treatment safer, easier, and more effective.